
How to Clean a Saxophone Neck
I had a lot of searches ending up on this site looking for instructions on how to clean a saxophone neck. I have written an article to explain the process. Hopefully it will be useful to searchers.
It is easy to do and only a few basic household items are needed.
The method described should work on all saxophones with detachable necks. If your soprano has a fixed neck, then you can only clean the mouthpiece end of the tube with a bottle brush as best you can.
Why is it important to clean inside the neck?
- To remove any calcium deposits or bits of food which have ended up inside. This can build up over time causing problems with intonation especially on soprano saxes.
- Reduce any bacteria or mould build-up. The warm air from your body will contain all sorts of things which need to be kept under control.
How often to clean the neck?
- Every 6 months or so.
- When there is a bad smell.
- After the instrument has been taken out of storage before being used after a long time.
- When you are the new owner of a used instrument.
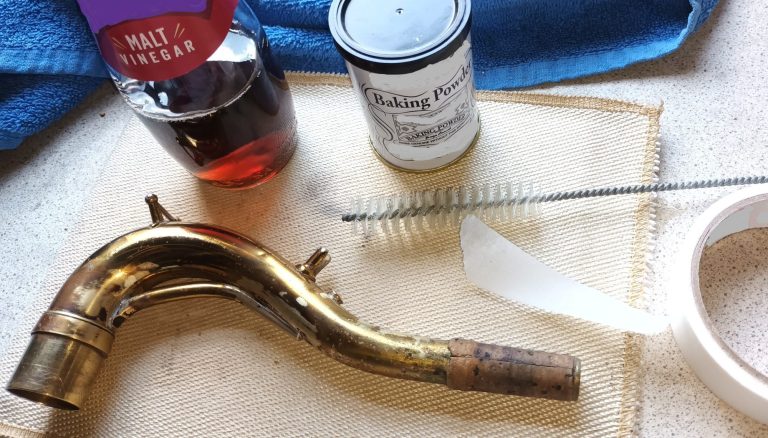
What tools and equipment will you need?
- Bottle brush or trumpet valve brush
- Liquid hand soap
- Masking tape
- Narrow flat-head screwdriver
- Baking powder (Sodium Bicarbonate)
- Vinegar (any type will do)
- Clean running water
- Teaspoon
- Washing up bowl or container size around 10 litre (2 gallon)
- Paper clip or thin electrical wire
- Light machine oil (optional)
- Small pliers (optional)
The Process
For soprano or higher instruments where the neck is not removable, follow step 4 only. If the body tube is very dirty inside, it will be worth removing all the keys and cleaning the body with a swab and soapy water.
Step 1 – Remove Octave Lever
Use a small flat-head screwdriver to unscrew the octave lever rod. The lever is slightly sprung so expect it to pop up slightly as the rod is removed. If the rod is difficult to pull out with fingers, use the pliers to pull it out of its tube but make sure it is fully unscrewed first.
This step is important to prevent water getting on the pad which could ruin it.
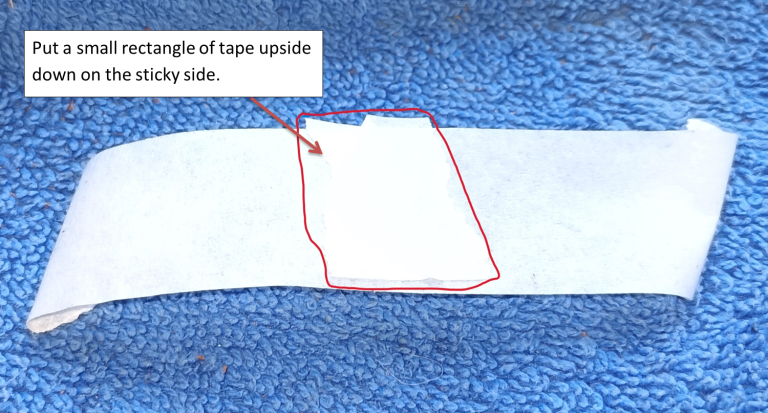
Step 2 – Tape over octave pip
Use masking tape over the octave pip to stop it leaking when cleaning.
Put a small piece in the centre of the tape upside down. This will go over the octave pip. This is important so the glue on the tape does not get on the octave pip which would make it sticky.
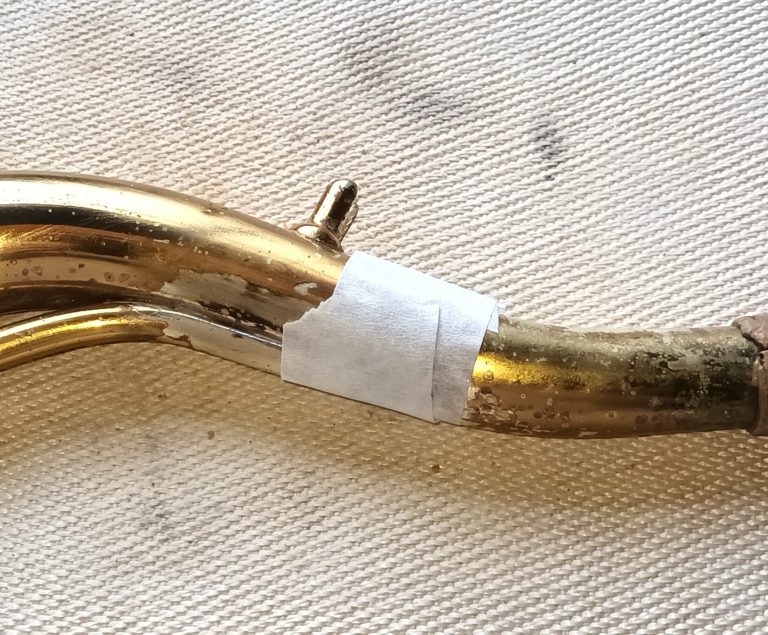
Wrap the tape around the octave pip. The non-sticky part of the tape needs to go over the octave pip.
Step 3 – Clean with foaming liquid
This is the messy step so work over a bowl or sink!
- Block the mouthpiece end of the neck with shop/kitchen towel so it will not leak too badly.
- Put a level teaspoon of baking powder into the large end of the neck.
- Add vinegar until it starts to fizz.
- Hold the neck as level as you can and rotate it gently forward and back to move the fizzing mixture around.
While the mixture is fizzing, it will lift any deposits up.
After a few minutes, you can remove the tape and allow the liquid to drain through the octave pip. The mouthpiece end bung can be removed too.
Tip the neck to drain all the liquid after a few minutes.
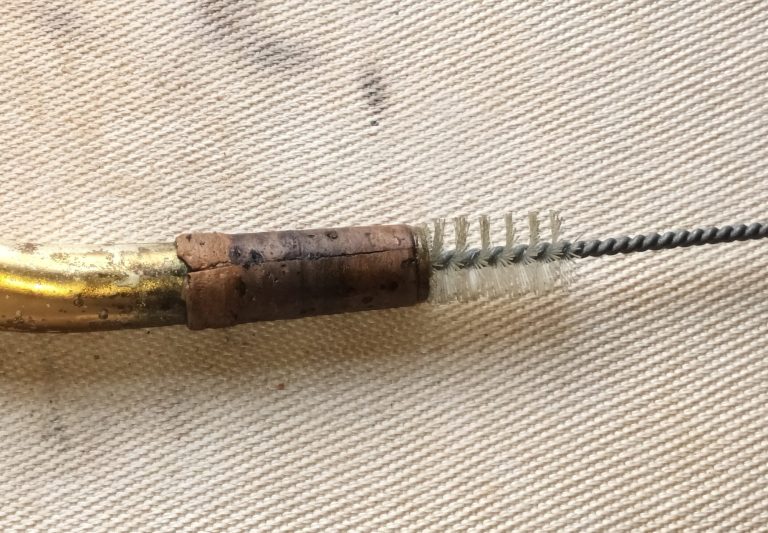
Step 4 – Clean with soap at the mouthpiece end
Mix some hand soap and water in a clean container or sink. Dip the brush in the soapy water and clean the mouthpiece end of the neck. You do not need to be too vigorous. A light brushing for 30 seconds should be enough to clean any dirt away.
Step 5 – Clean octave pip with wire
Unfold the paperclip or using a thin wire, gently put it inside the octave pip hole and carefully move it up, down and around. Small deposits can get stuck here and it is worth cleaning then away.
Step 6 – Rinse with clean water
Using clean running water, flush the inside of the neck. Be careful not to soak the cork at the mouthpiece end. The cork will be fine from a few splashes, just try not to get it saturated.
Step 7 – Dry the inside using a swab or shop/kitchen towel
If you have a neck swab, use that to dry the inside of the neck. A small handkerchief or paper tissue also works. Do each end of the neck separately and carefully. Try not to get it stuck!
If it does get stuck, blow very hard in the mouthpiece end or flush with water. Do not try to force it out with a rod; the metal in the neck can be thin and easily damaged.
Dry the outside with a soft cloth or silver polishing cloth if the neck is silver plated.
Allow the neck to air dry in a safe place for a few hours to clear any remaining moisture inside.
Step 8 – Replace Octave Lever
Replace the octave lever by aligning it with the tube or posts on the neck. You will need to hold it down with gentle pressure using a thumb. Then insert the rod with fingers. You may choose to put a drop of light machine oil on the rod before putting it back in.
Screw the rod into position until it stops. It does not need to be tight. The rod only fits one side, if the rod cannot be inserted with gentle force try putting it in the other side.
Rock the lever several times and check the rod stays in place. If it does not, unscrew it slightly until the binding stops.
Step 9 – Play
Put a reed on a mouthpiece, grease the neck cork and put the mouthpiece on the neck. Put the neck on the saxophone and play!
You may notice the saxophone is slightly more free-blowing, has a brighter timbre and the octaves speak more easily if the neck was very dirty.
Duncan Saunders 27-May-2025